Professional Installation Process
Expert Artificial Turf Installation
Discover our comprehensive installation process that ensures your artificial turf looks perfect and lasts for years. Our certified professionals handle every detail with precision and care.
Our Installation Process
From initial consultation to final inspection, we ensure every step meets the highest standards
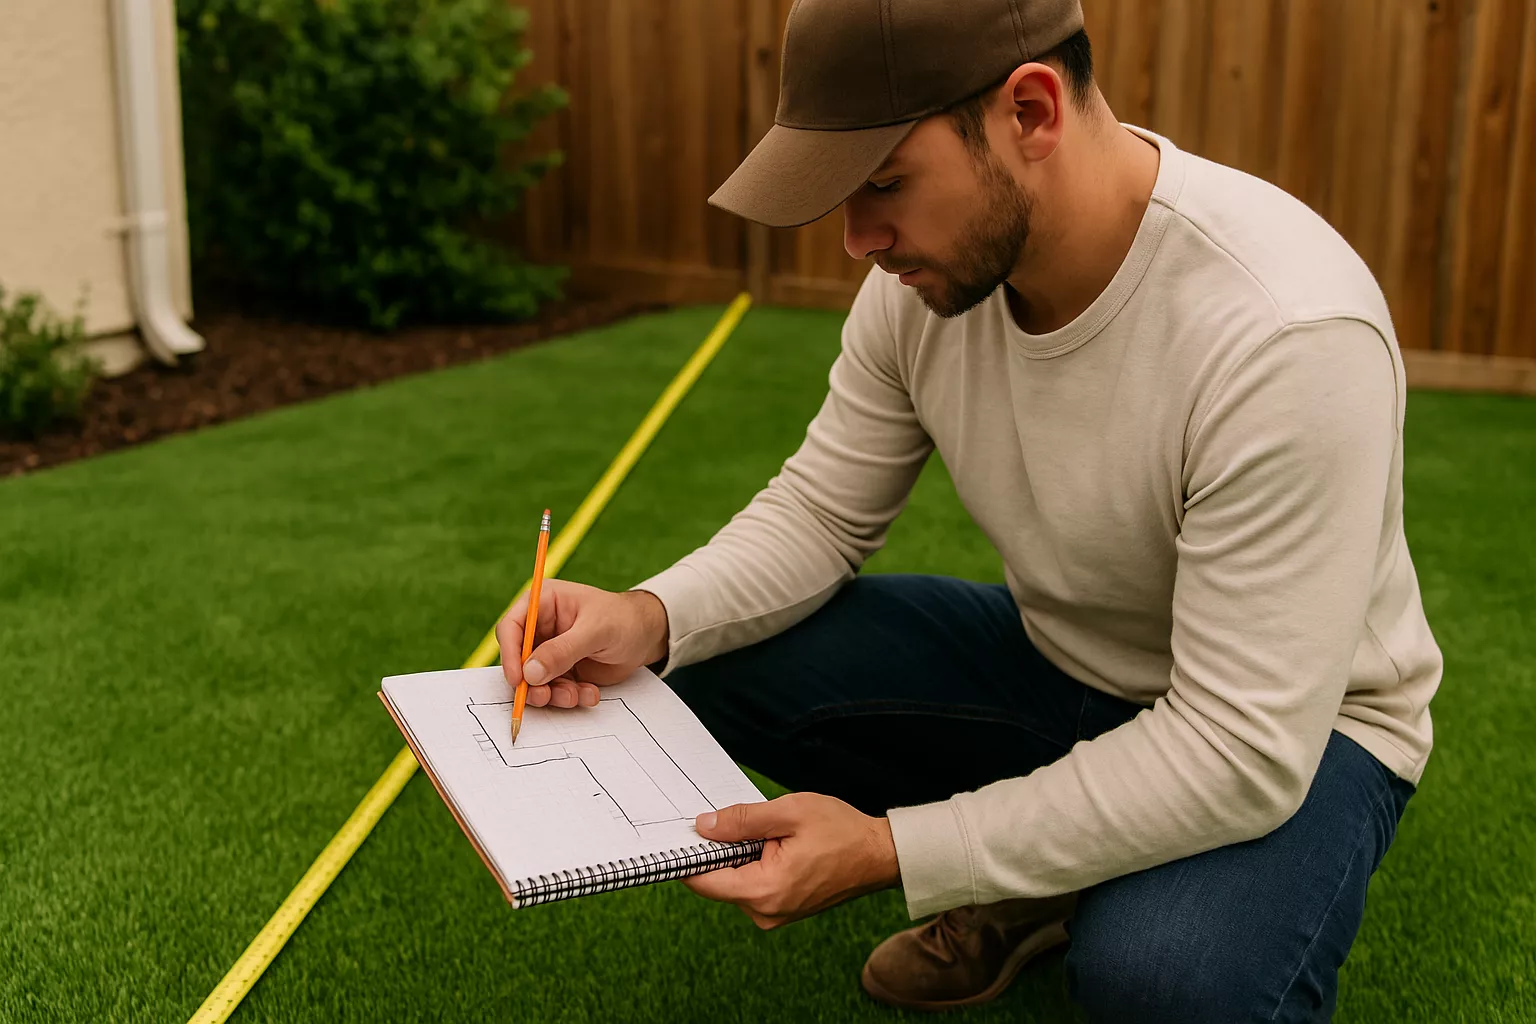
Site Measurement
Precise measurements of all boundaries, obstacles, and transitions to ensure a perfect fit.
- Measure perimeter, contours, and slopes
- Mark utilities, gates, and high-traffic areas
- Create measurement sketch for planning
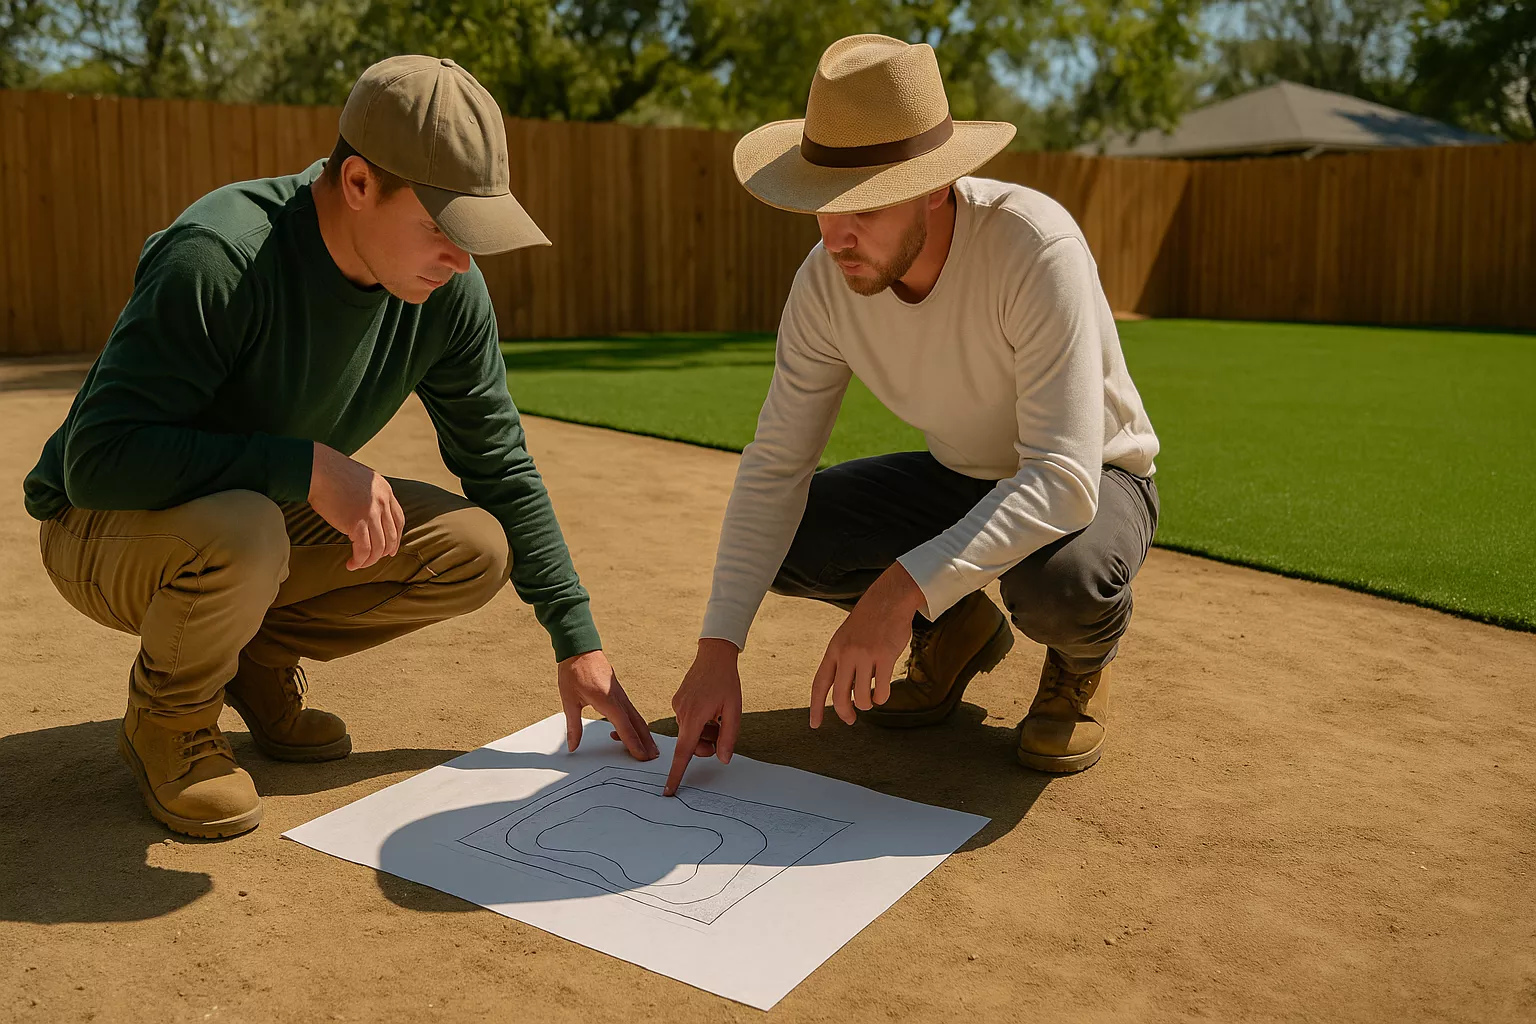
Design & Layout Planning
Develop a tailored layout, seam map, and transition details based on your preferences.
- Plan seam directions to minimize visibility
- Define curves, edges, and border treatments
- Calculate material yields and cuts
- Review our artificial turf installation cost guide to understand pricing.
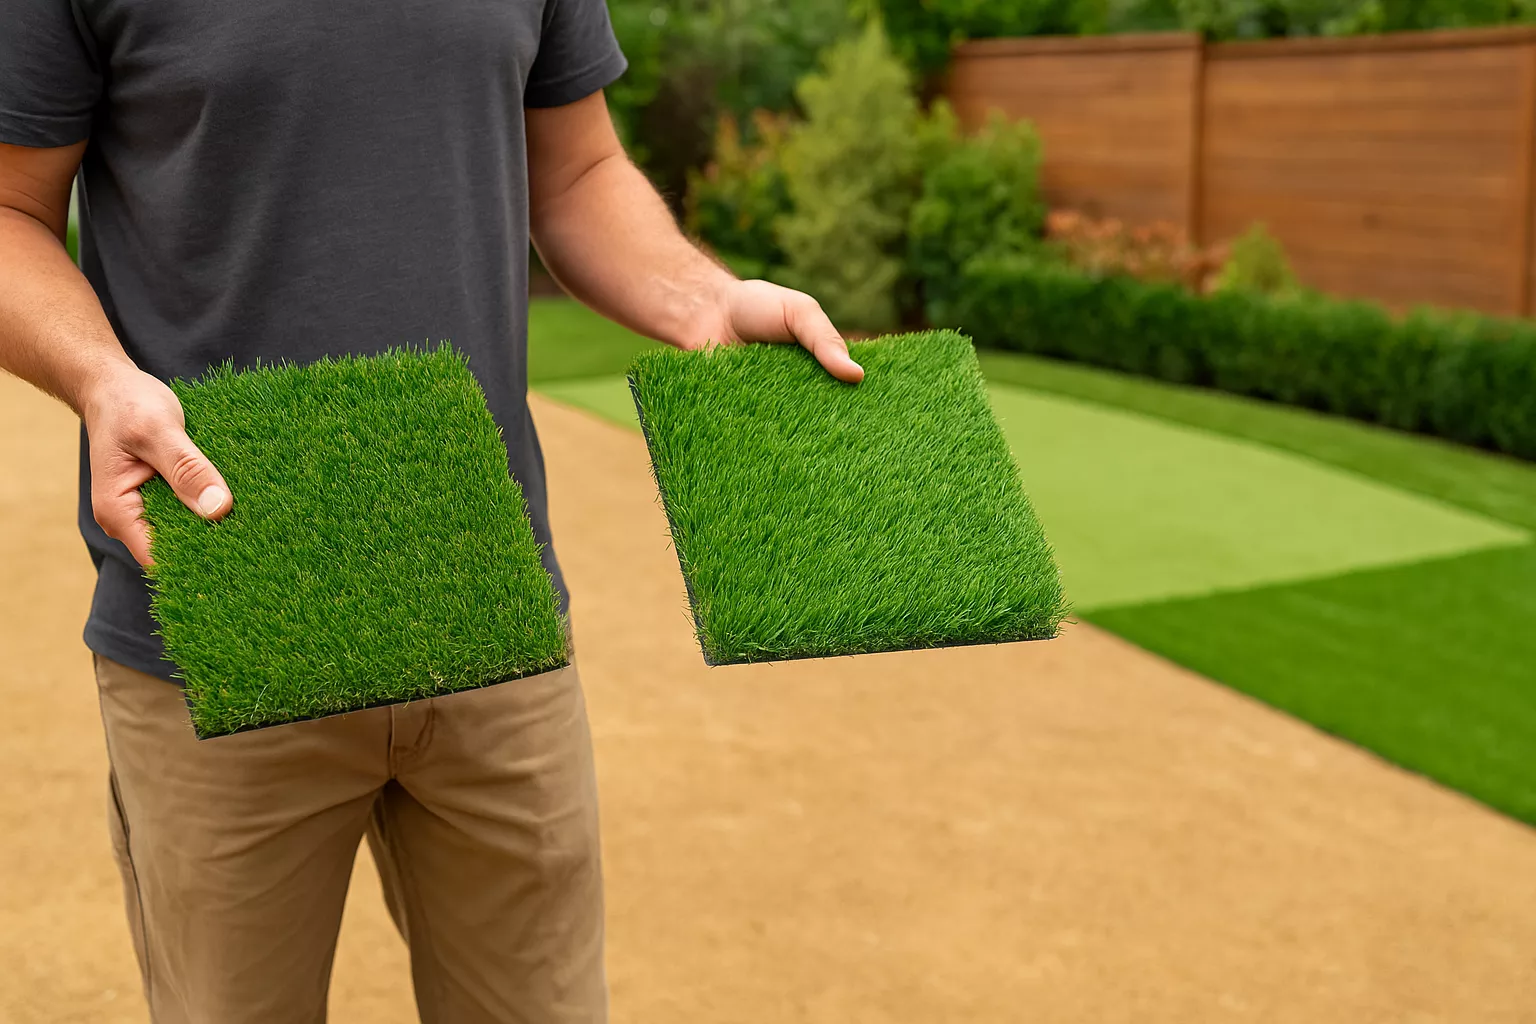
Turf Selection
Choose the ideal turf product for your use-case, comfort, and appearance.
- Match pile height and density to usage
- Select color blend and thatch style
- Confirm UV resistance and warranty
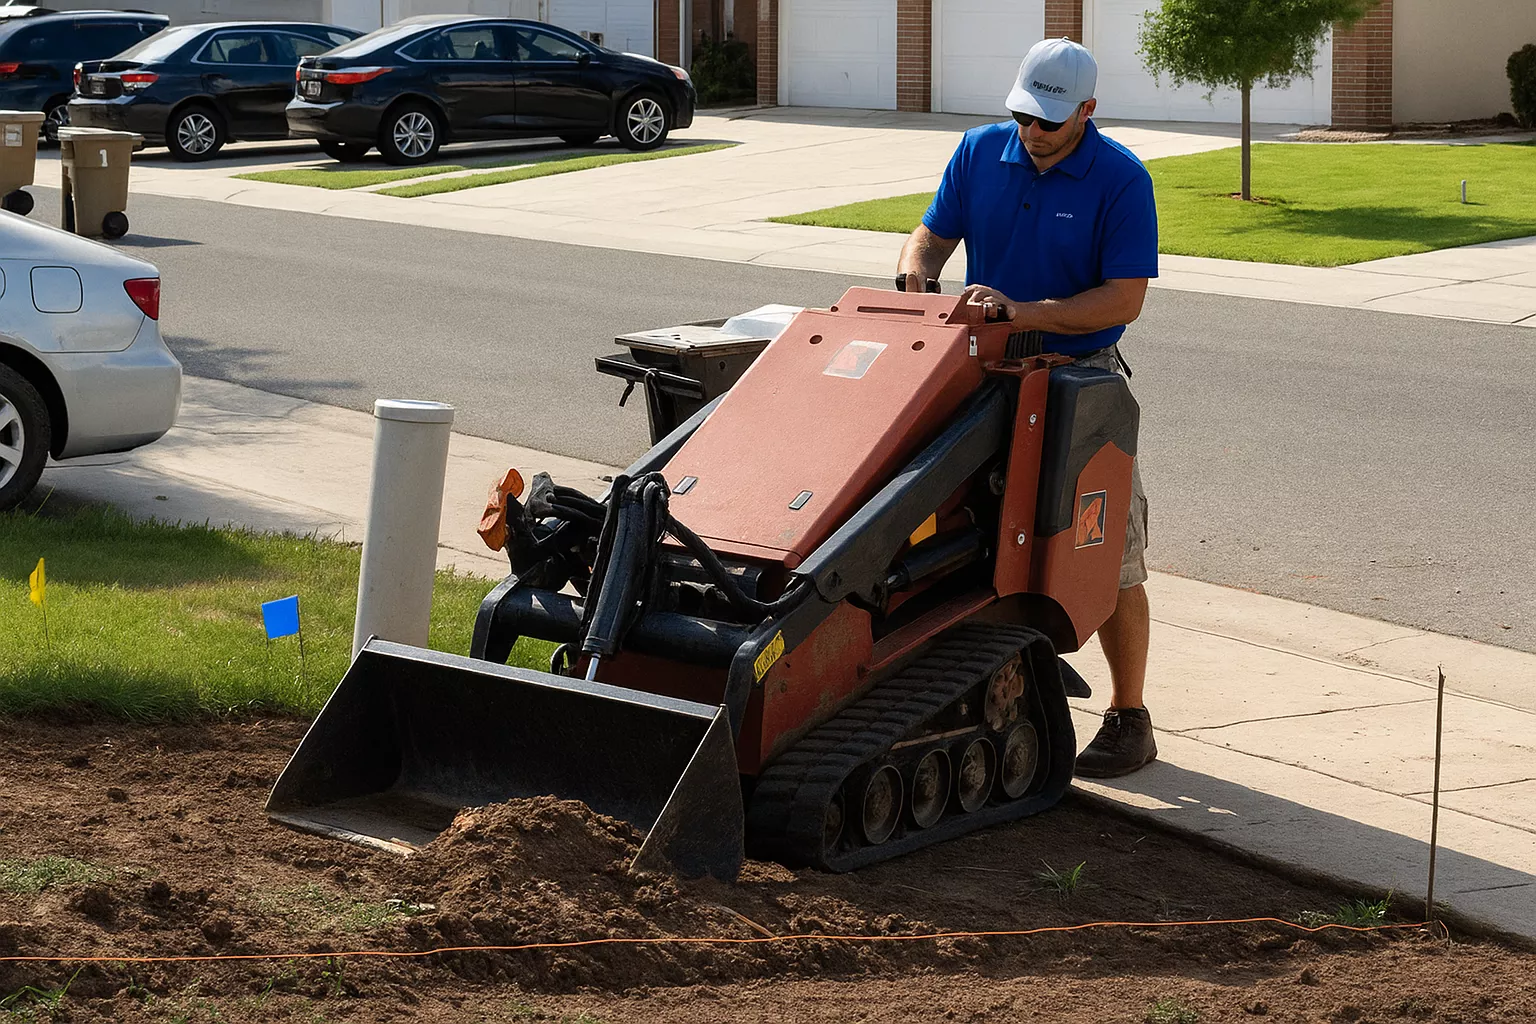
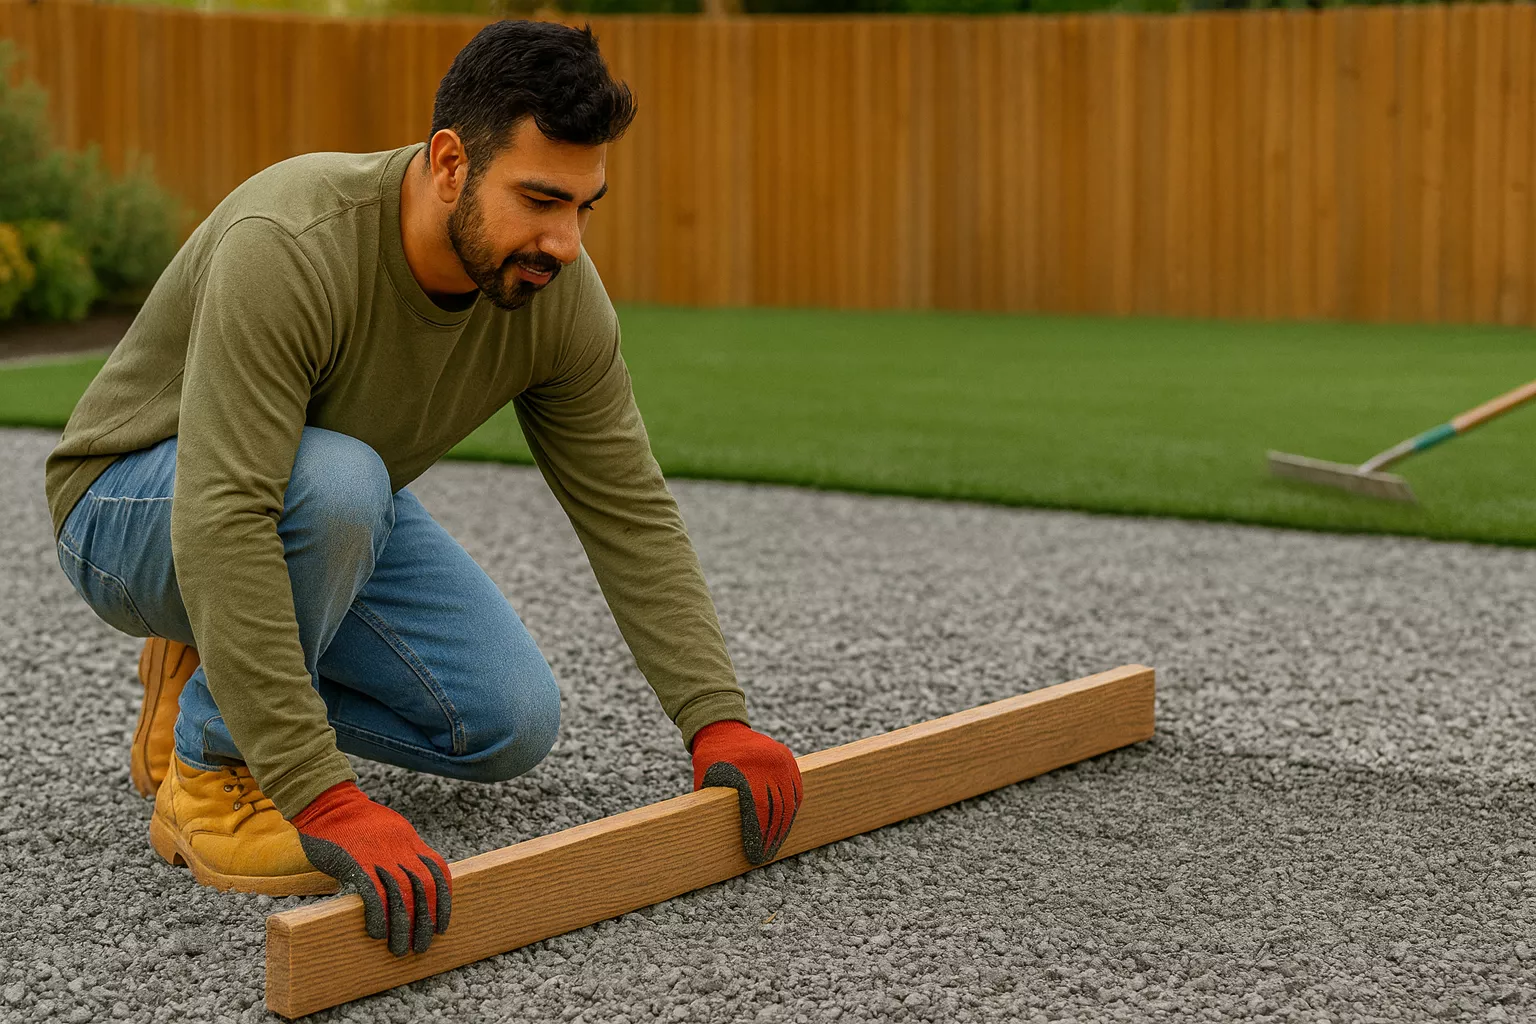
Remove Existing Surface
Remove grass, soil, and any existing materials to the proper depth for a stable base.
- Excavate to required depth (typically 2–3 inches)
- Haul away debris responsibly
- Eliminate roots and organic material
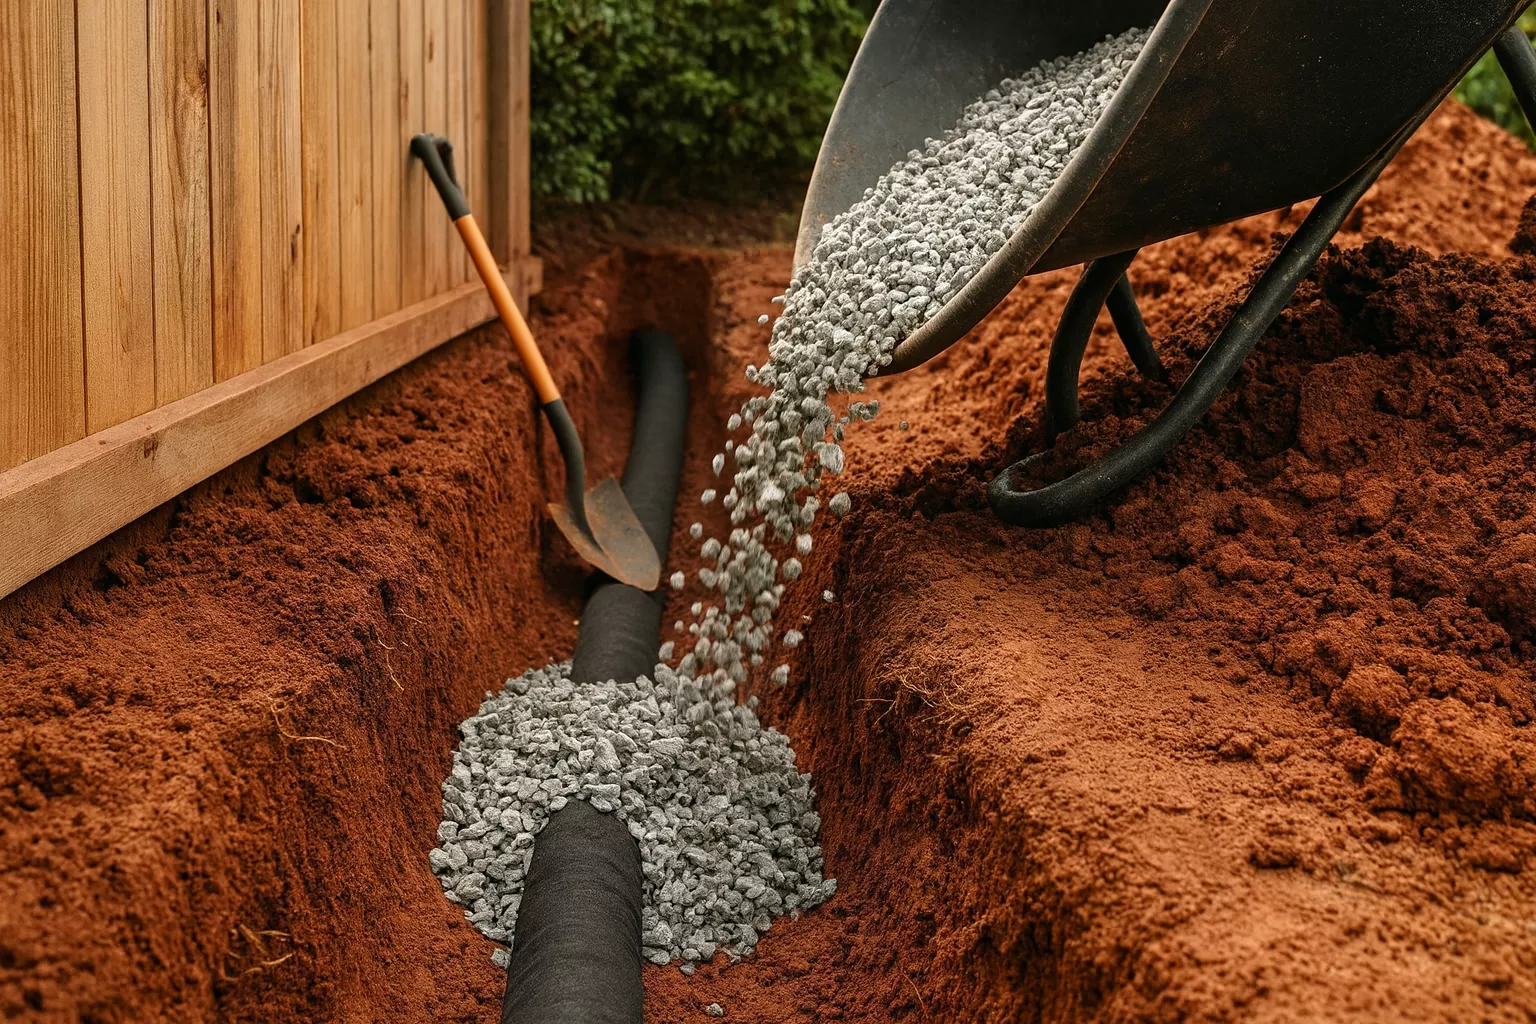
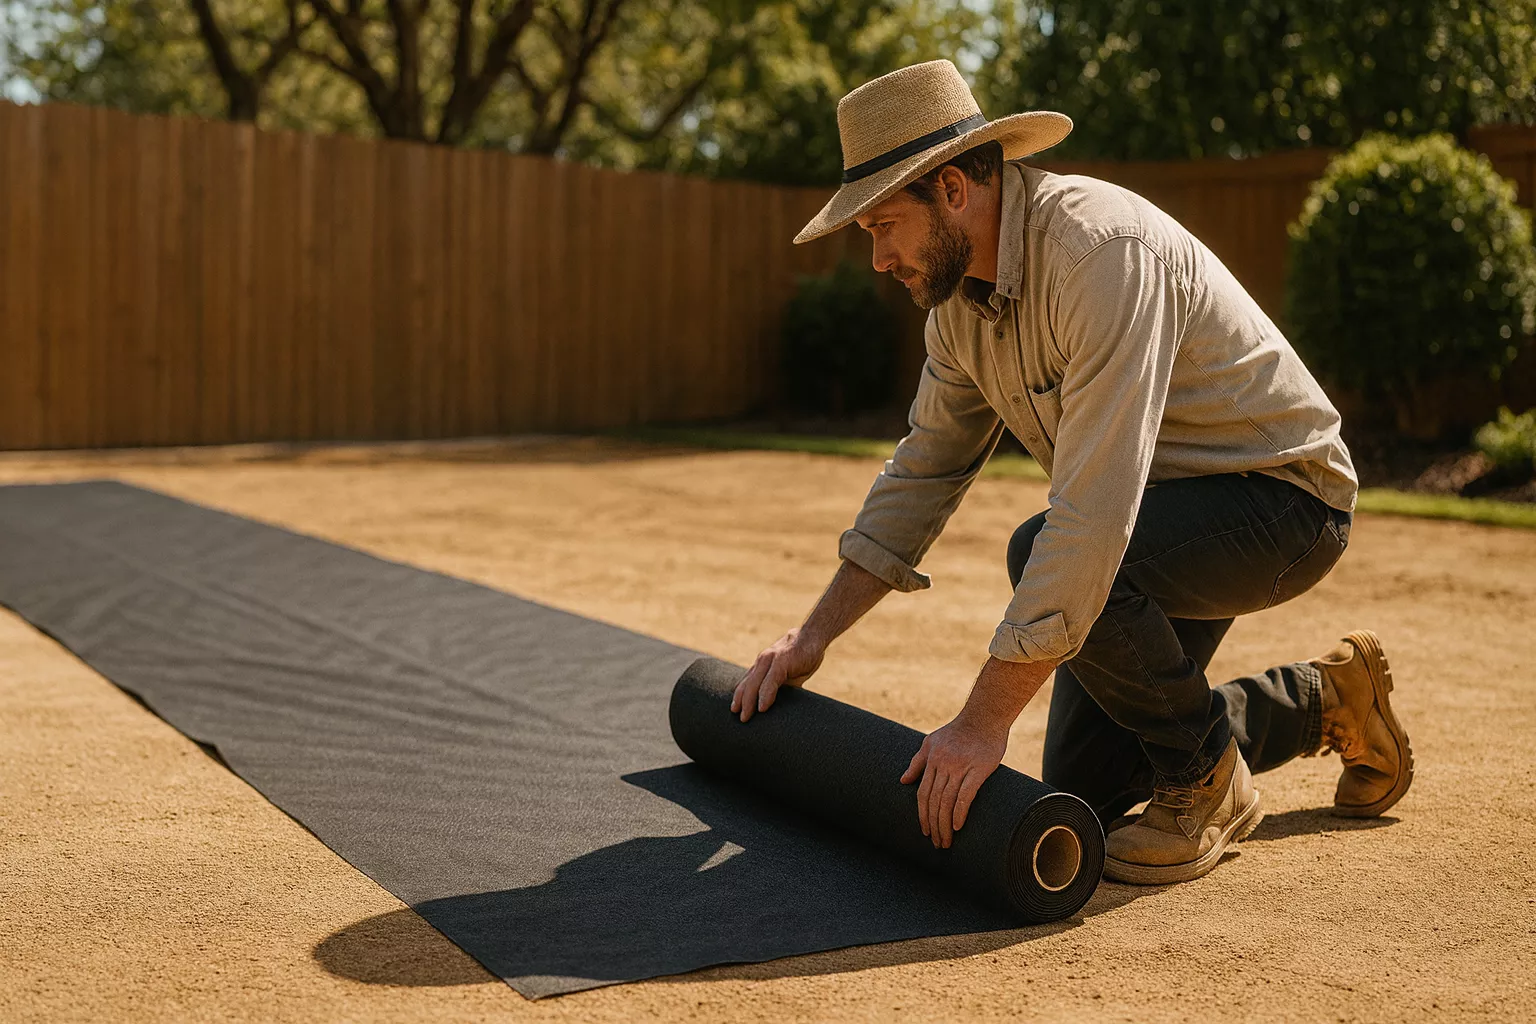
Drainage System
Install drainage components where required to manage water effectively.
- Trench paths for French drains if needed
- Lay perforated pipe with rock surround
- Test flow before base installation
Soil & Drainage Assessment
Evaluate soil composition and water flow to plan proper drainage and base materials.
- Check absorption and pooling areas
- Identify grade corrections needed
- Determine drainage solutions (French drains if needed)
Grade Surface
Establish proper slope and contour to direct water away from structures.
- Set fall for efficient drainage
- Smooth high spots, fill low areas
- Maintain transitions to hardscape
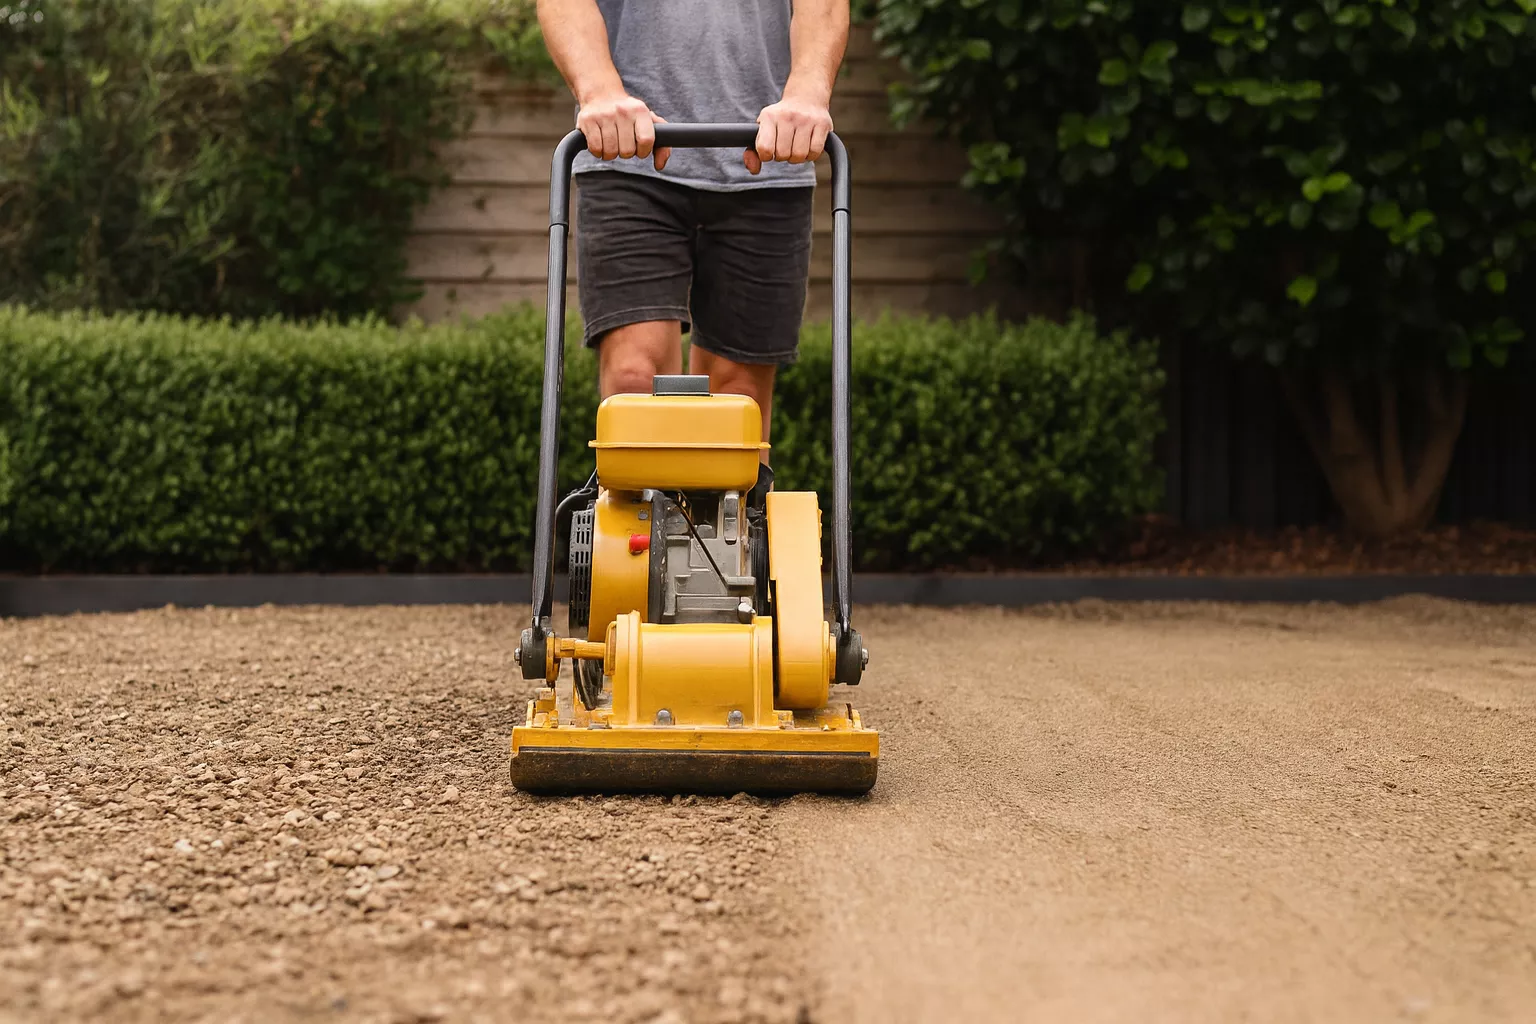
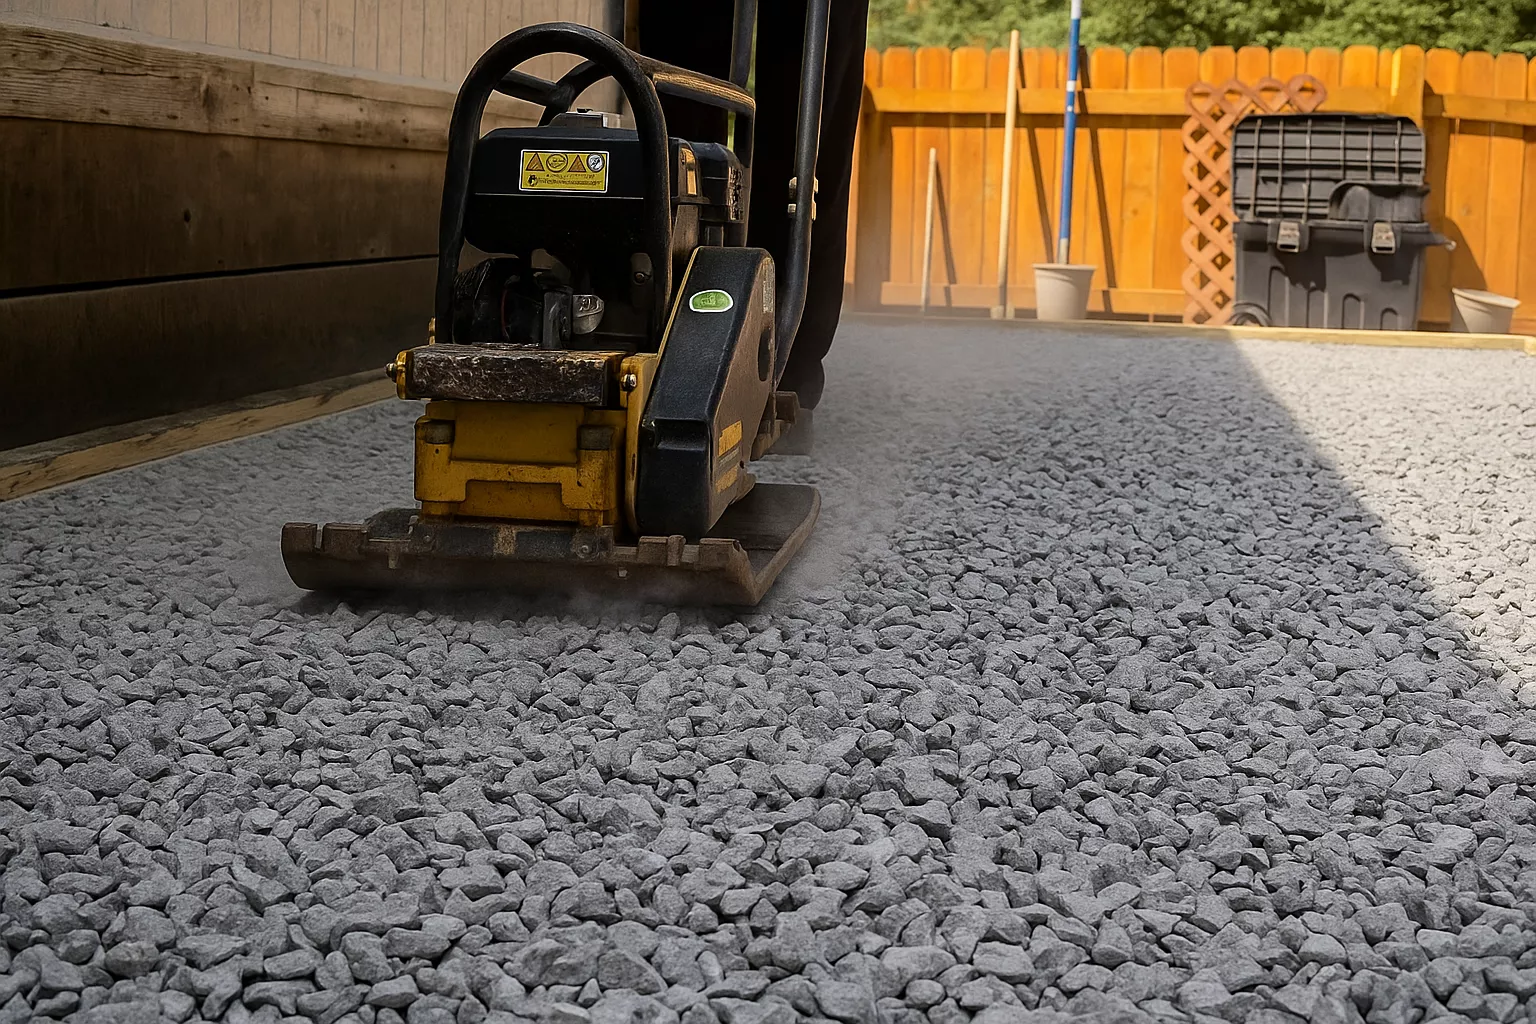
Compact Sub-Base
Compact sub-base to achieve the required density and long-term stability.
- Use plate compactor in passes
- Confirm compaction with spot checks
- Regrade and recompact if necessary
Clean Site
Clear rocks, roots, and debris to create a flawless working surface.
- Remove organic and loose materials
- Apply weed barrier if specified
- Fine clean before base install
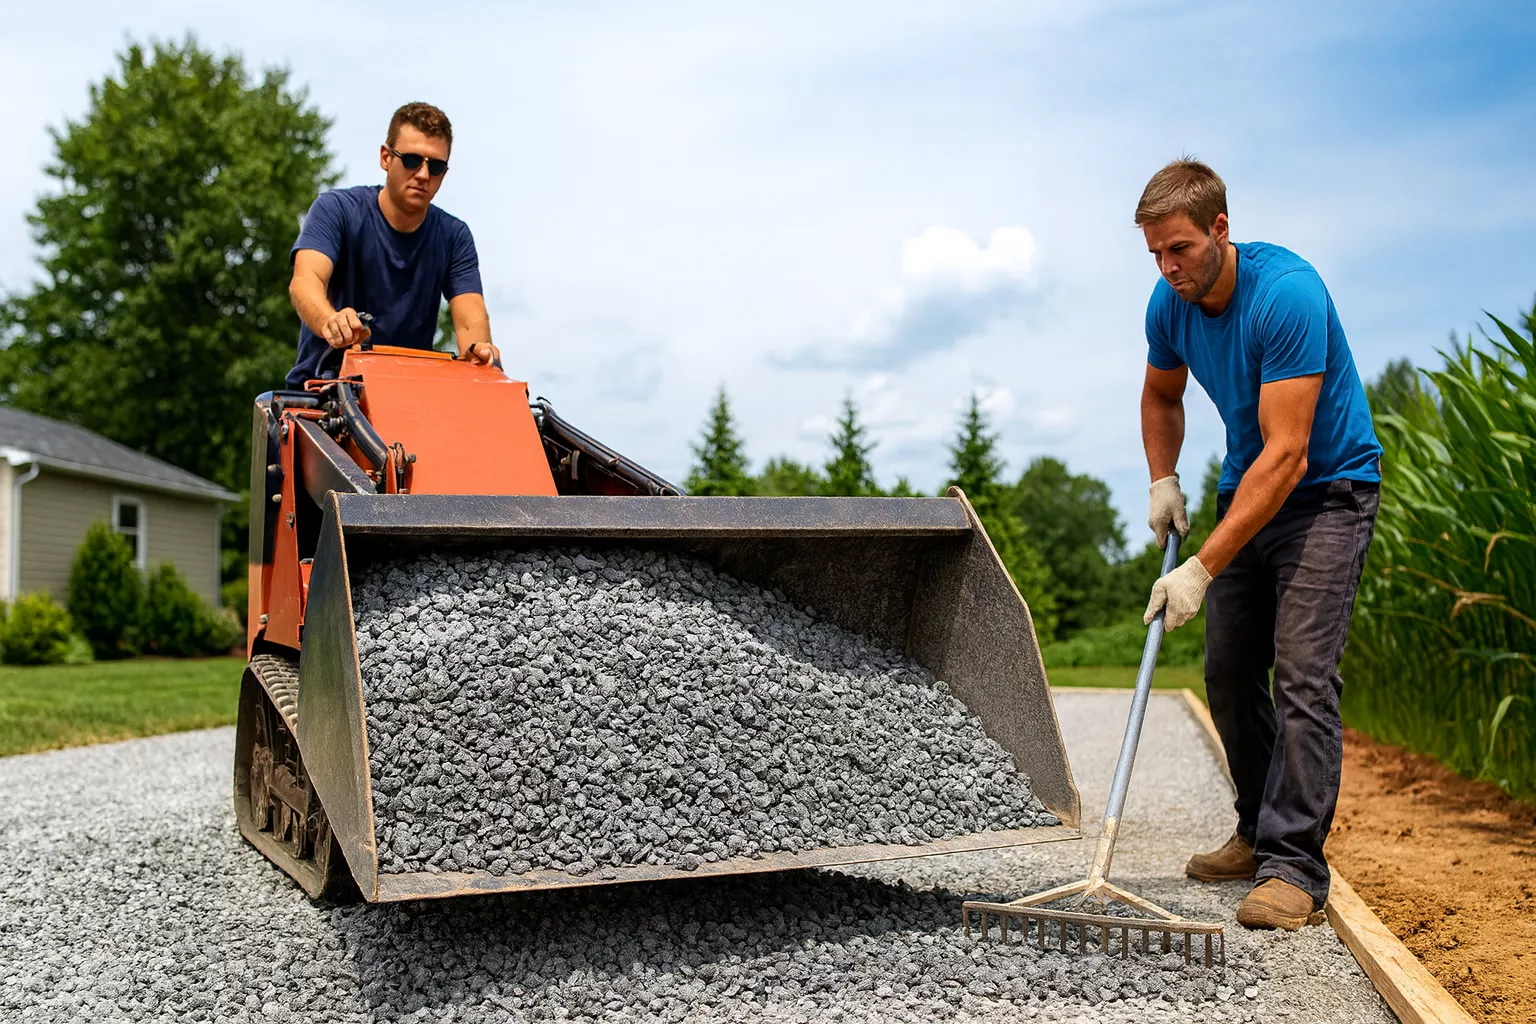
Base Layer
Install crushed rock or decomposed granite and shape to the final grade.
- Spread and rake evenly
- Fine grade for flatness
- Compact to specification
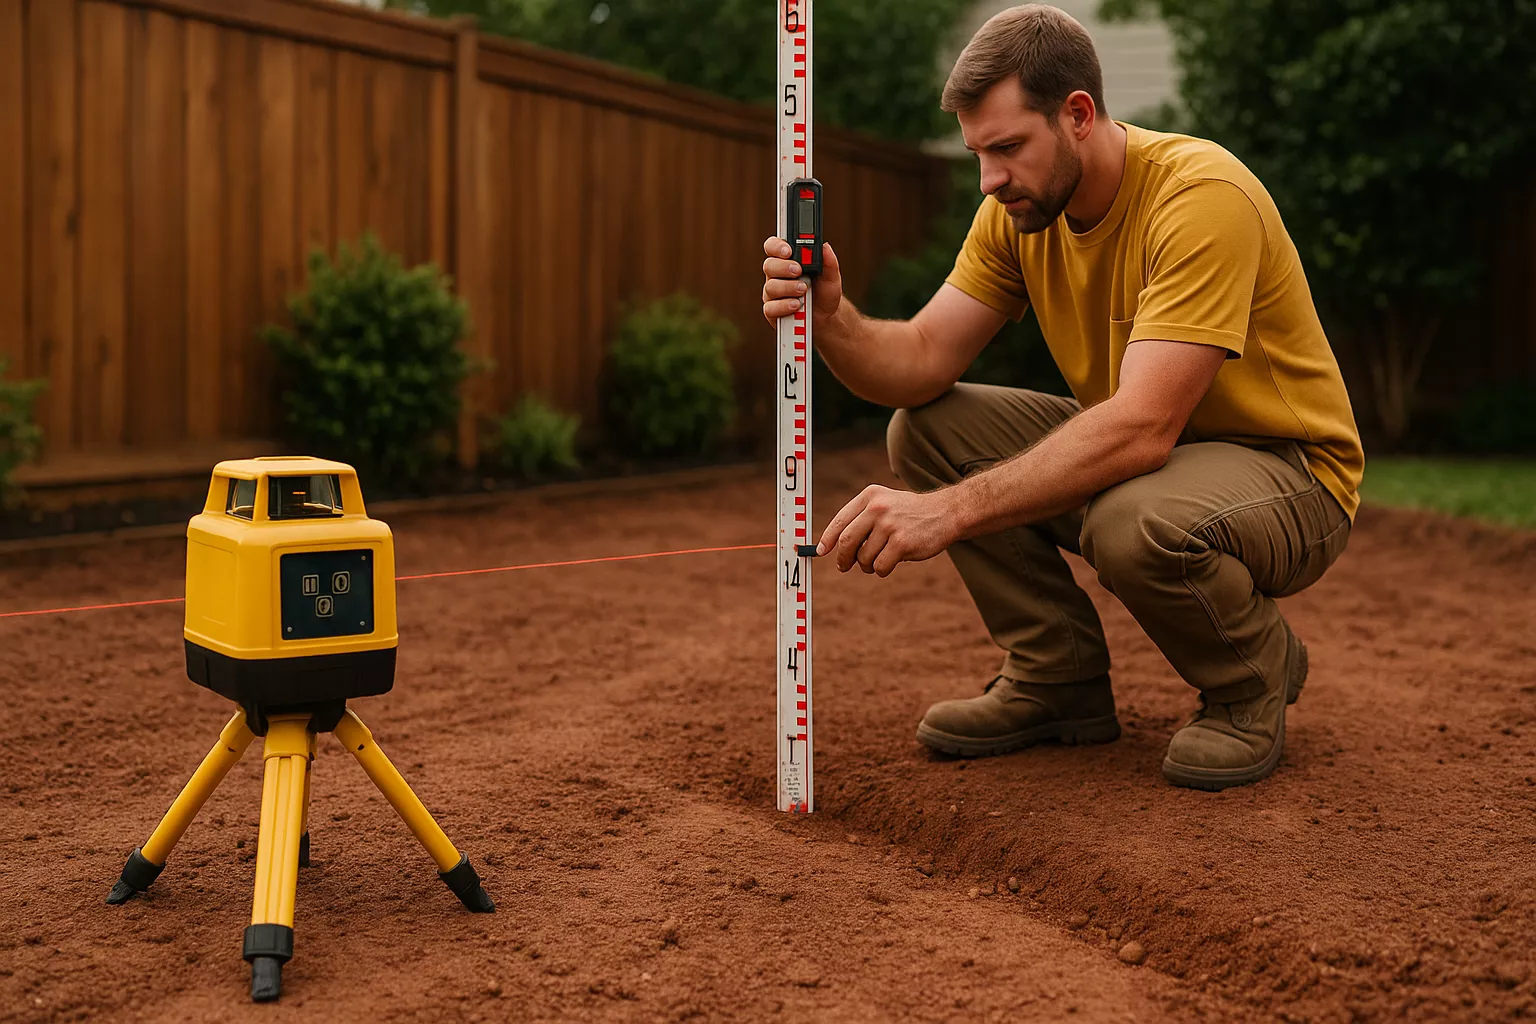
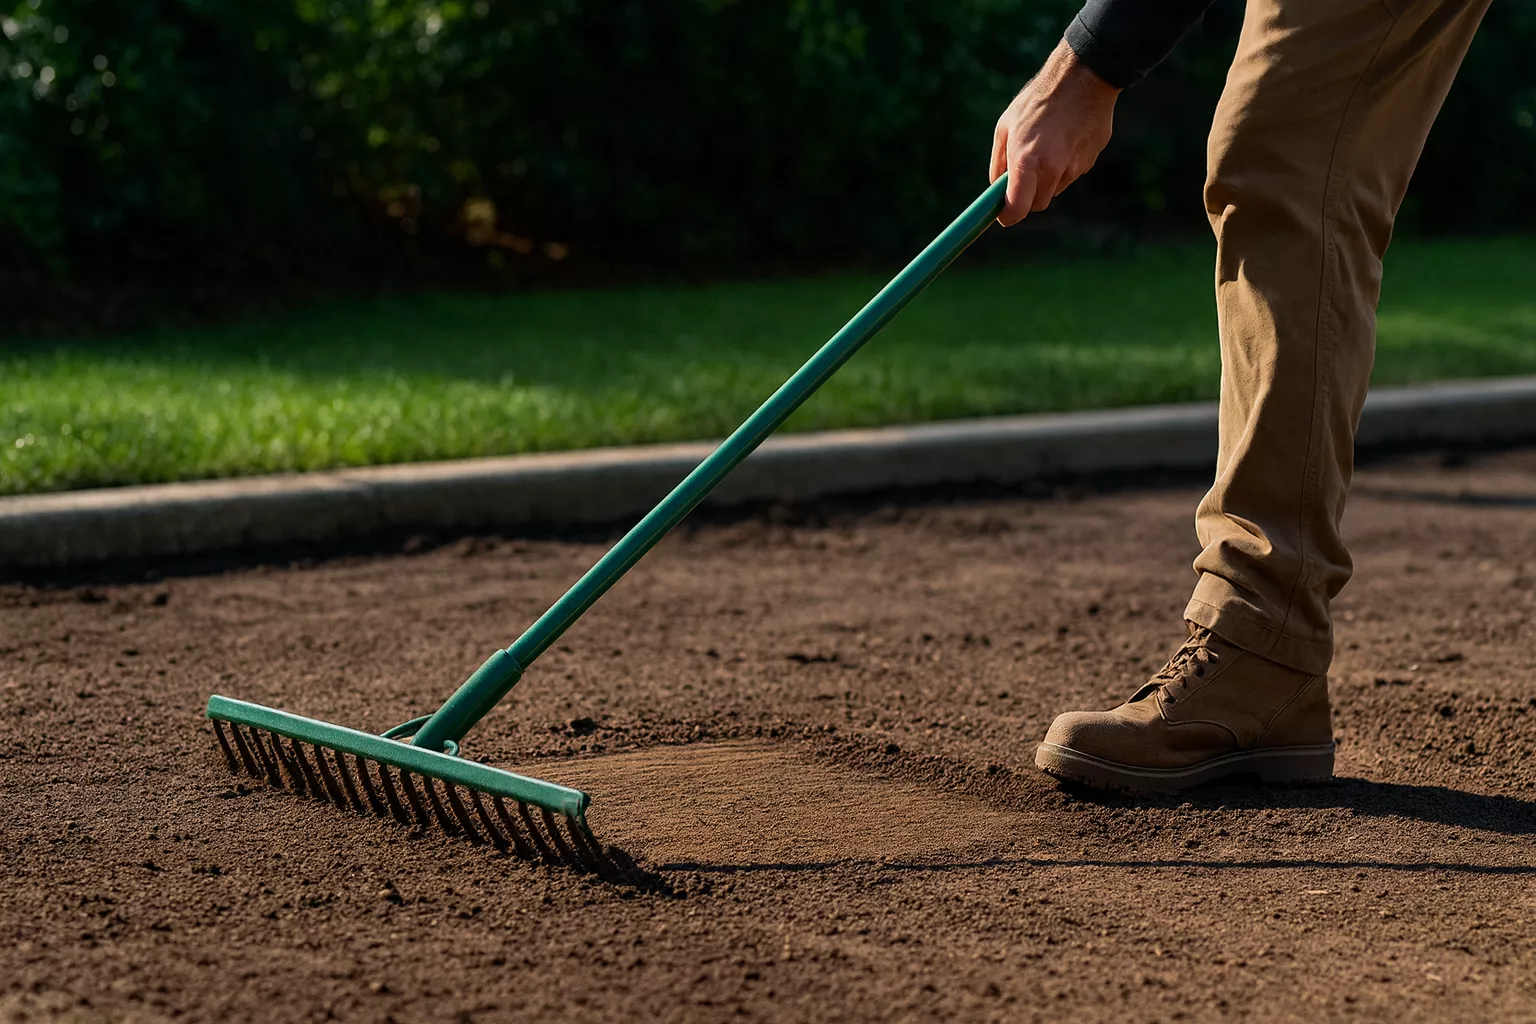
Level Surface
Perform final grading passes to achieve consistent flatness across the entire area.
- Check with straightedge and string lines
- Correct minor undulations
- Verify transitions align perfectly
Final Base Compaction
Recompact after leveling to lock in the base and prevent future settling.
- Compact uniformly across the area
- Repeat passes as required
- Perform final quality check
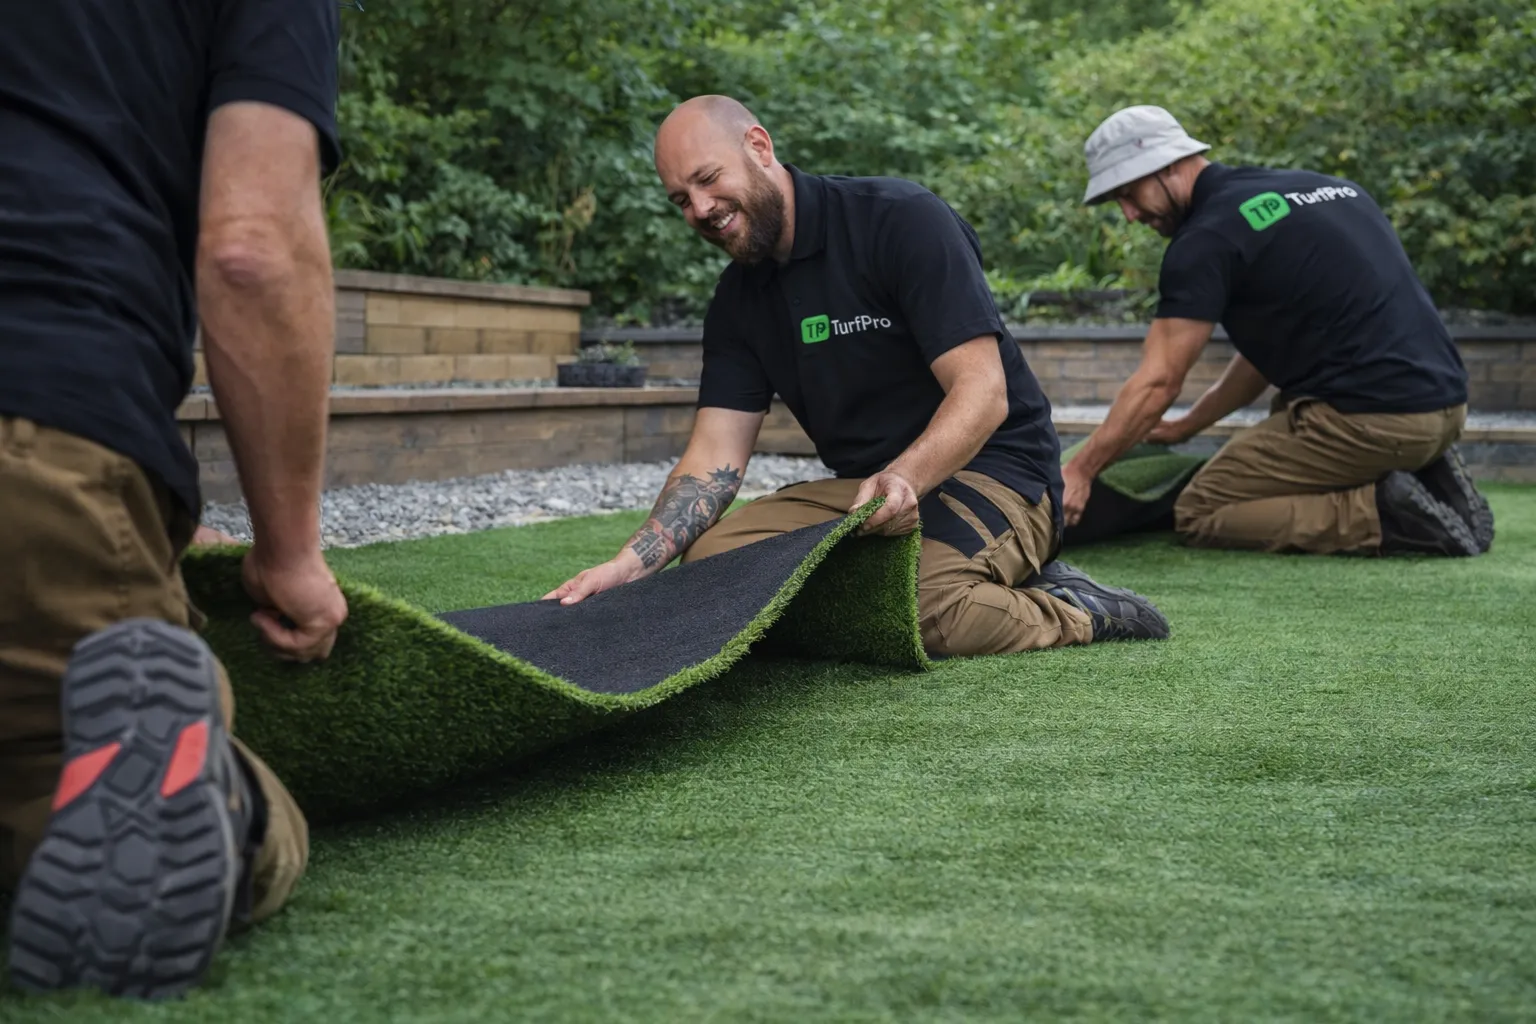
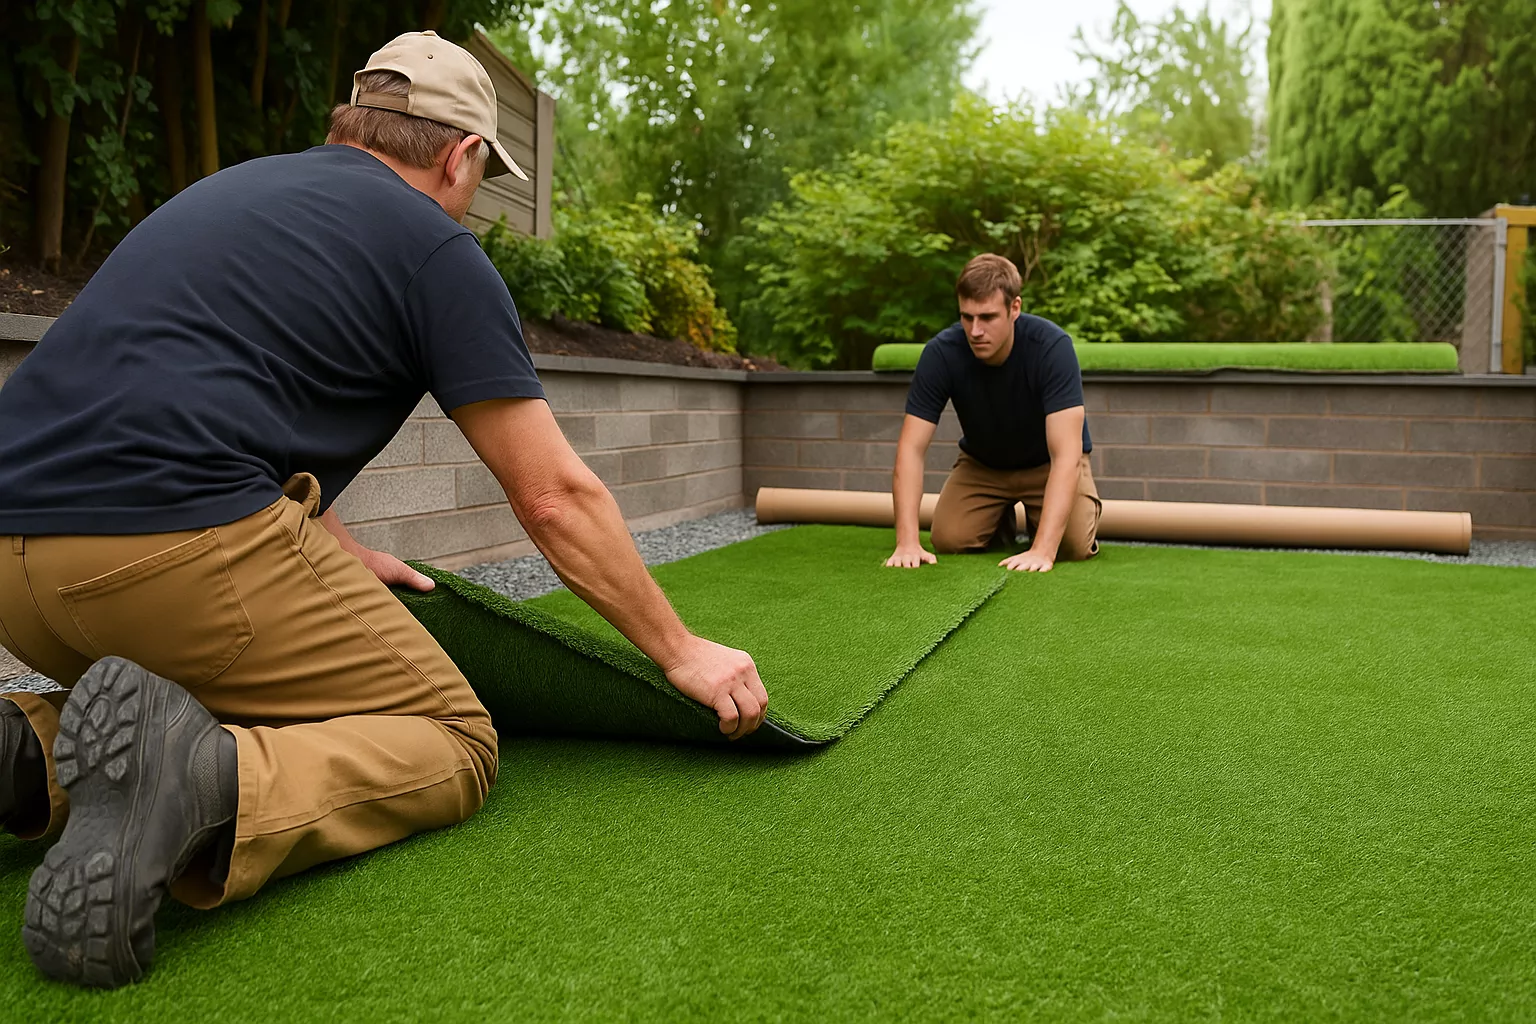
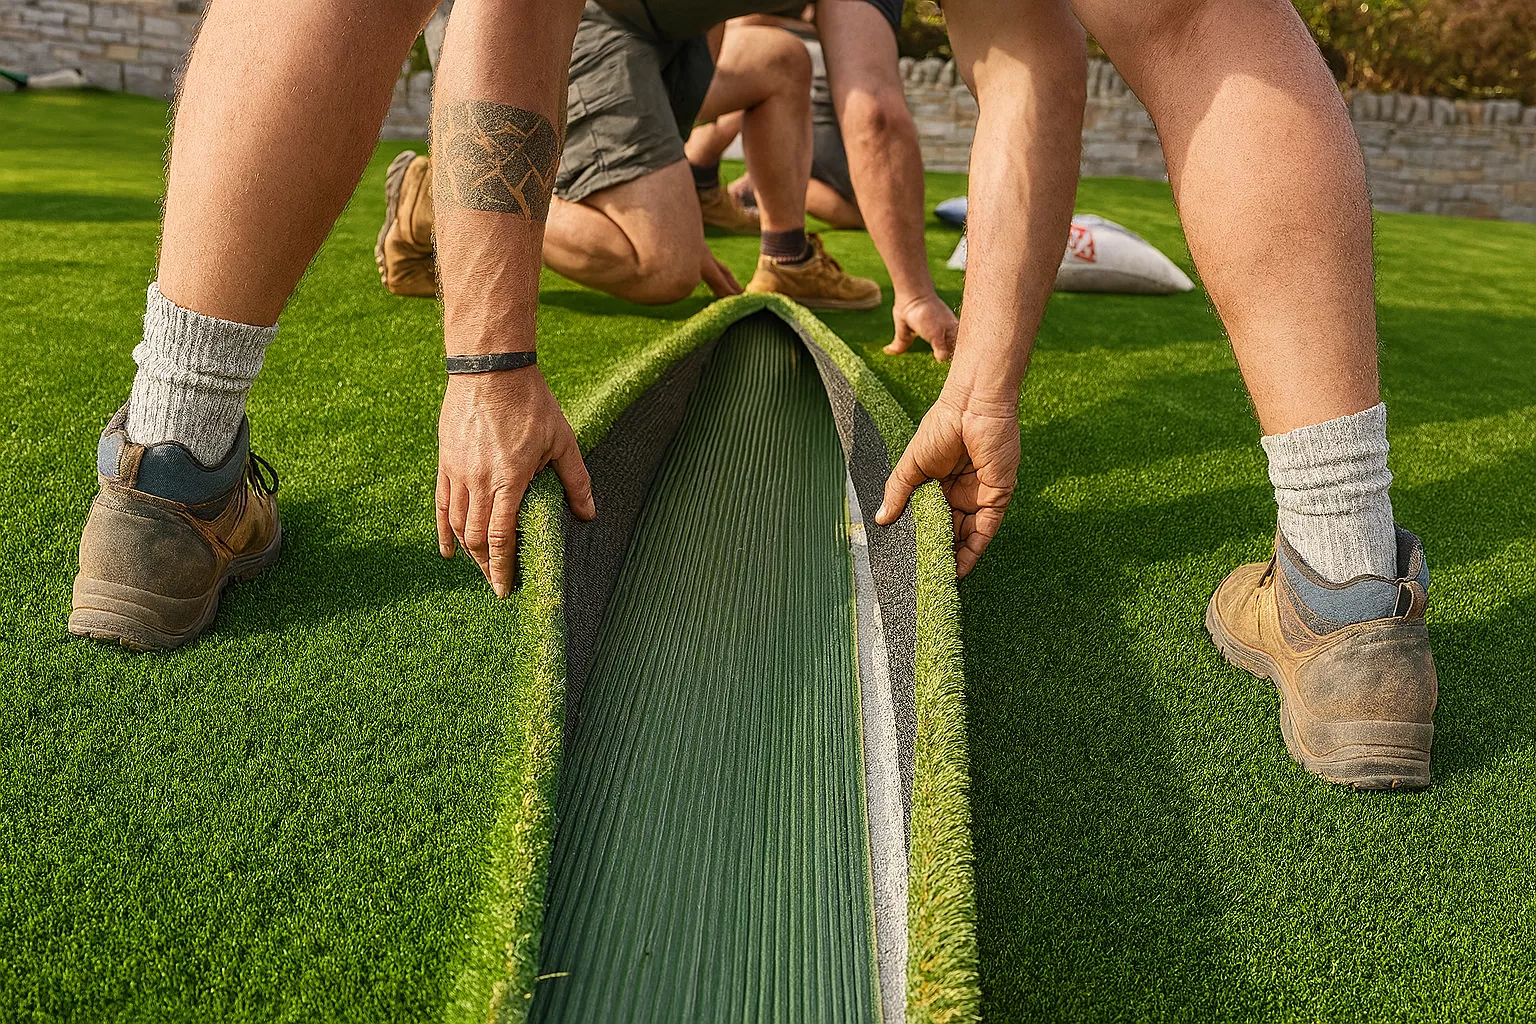
Unroll & Relax Turf
Unroll turf panels, align pile direction, and let fibers relax before cutting and seaming.
- Unroll panels and align grain consistently
- Allow turf to warm and flatten naturally
- Adjust placement to minimize visible seams
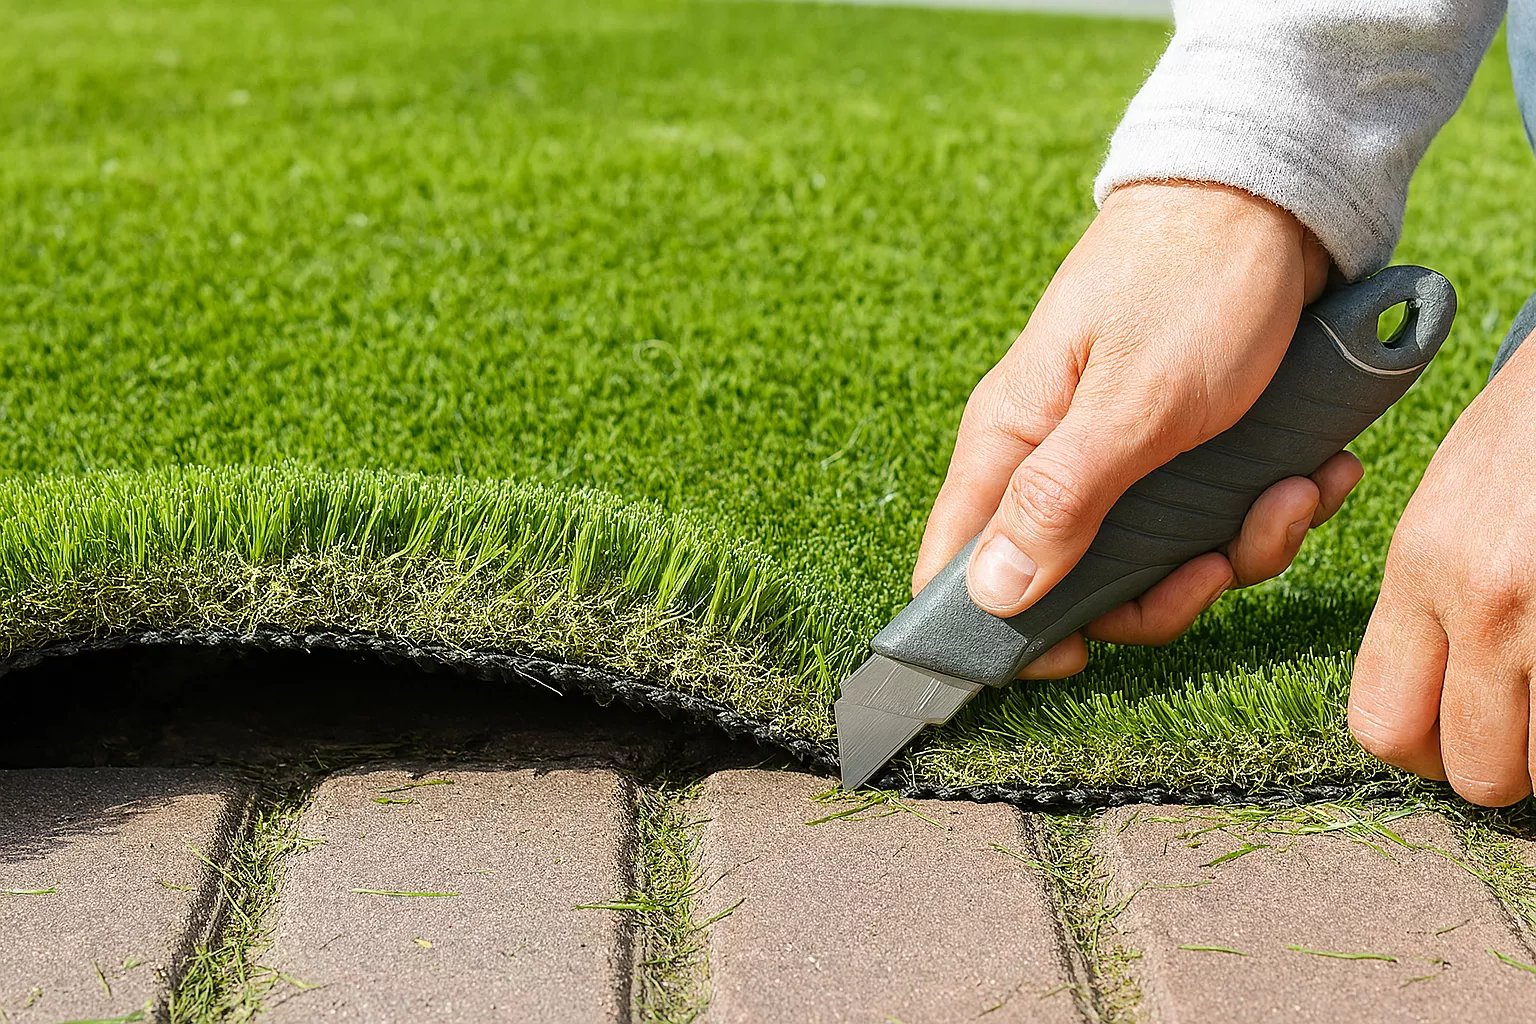
Precision Cutting
Position turf, align grain, and cut to fit perfectly around edges and obstacles.
- Align turf grain consistently
- Template and trim around borders
- Dry-fit panels before seaming
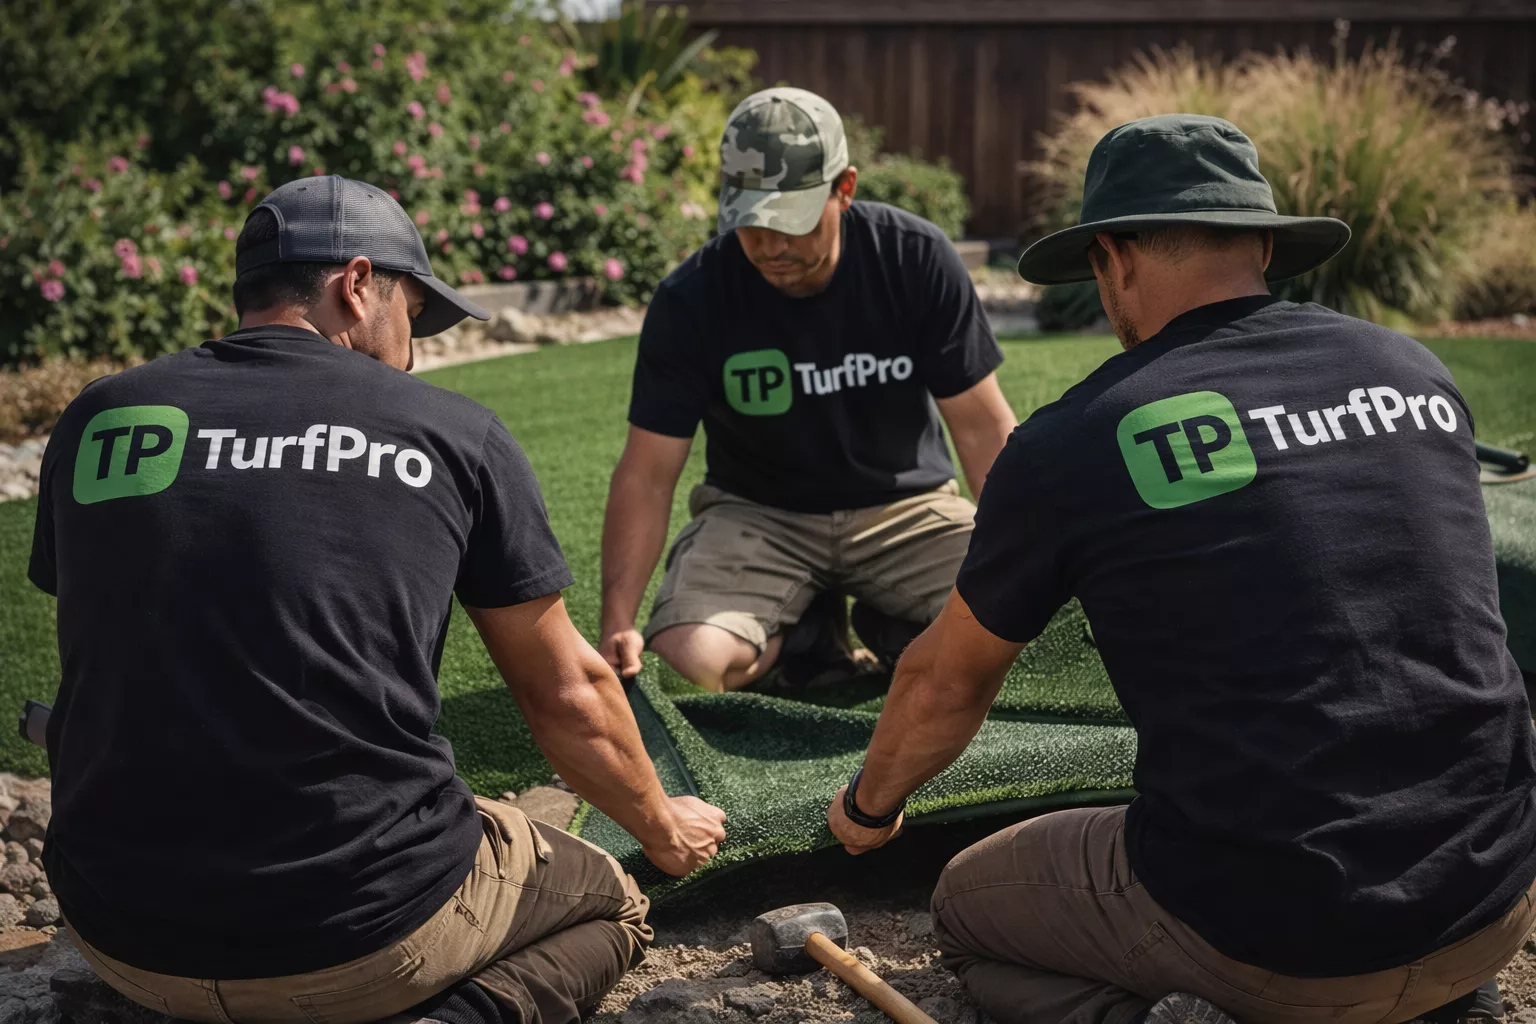
Seamless Joining
Create invisible seams using professional seam tape and adhesives with precise alignment.
- Trim edges to factory straight
- Apply seam tape and adhesive
- Set seam under tension for invisibility
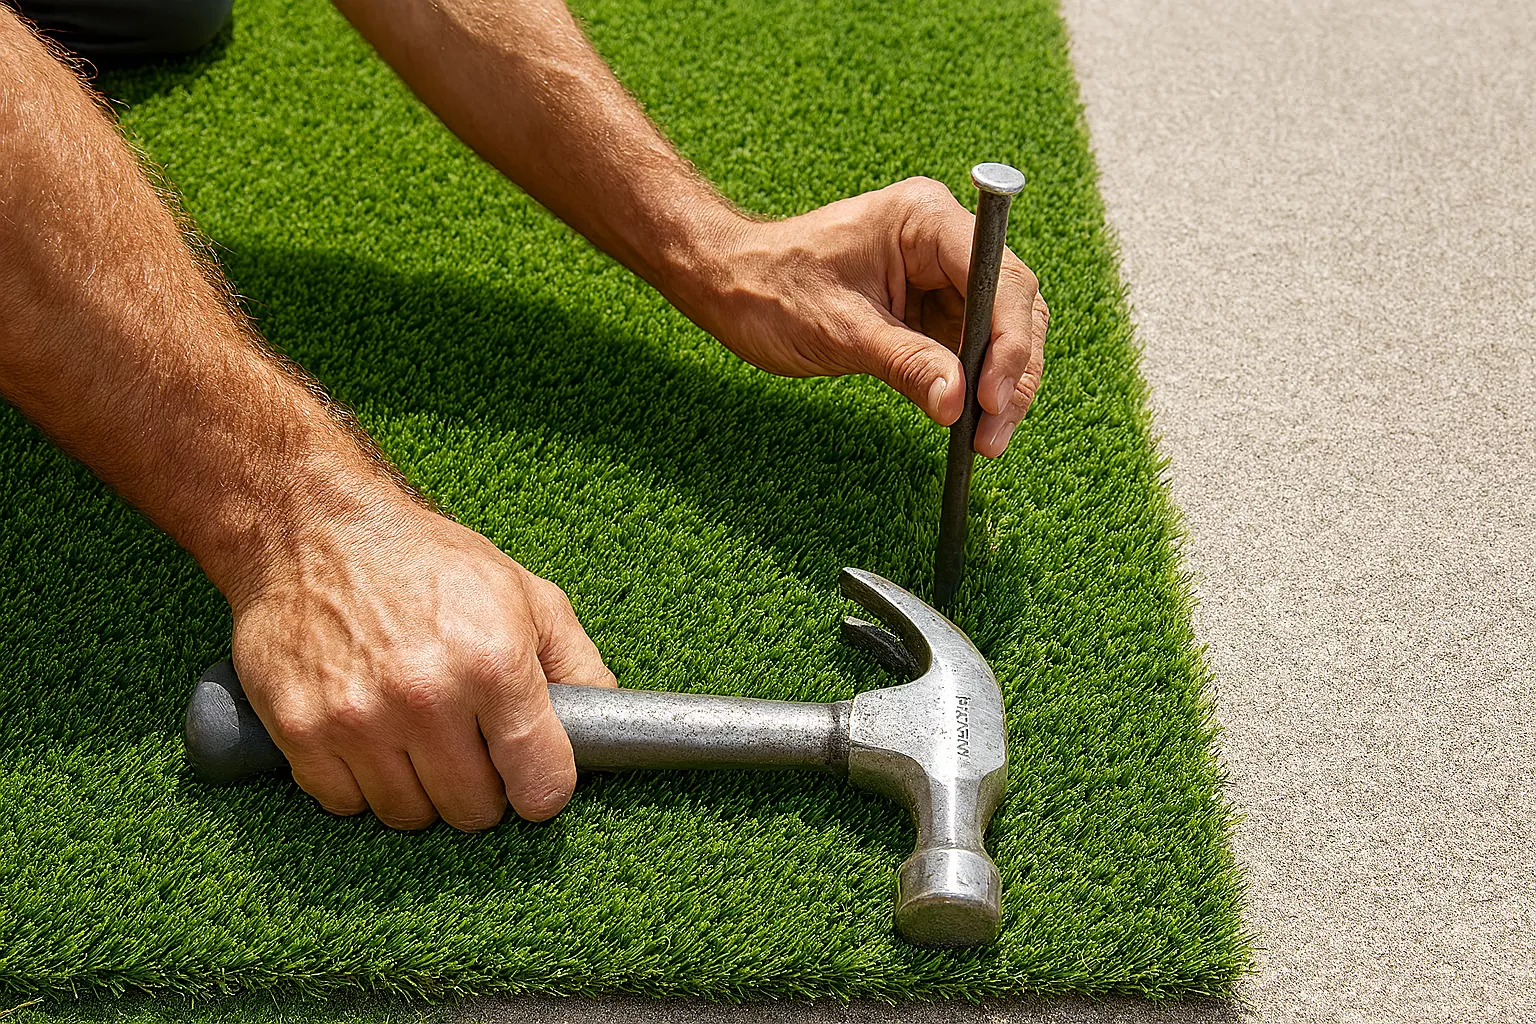
Secure Anchoring
Fasten turf around the perimeter and key areas to prevent movement.
- Use nails or staples at proper spacing
- Pin at borders and transitions
- Verify anchoring uniformity
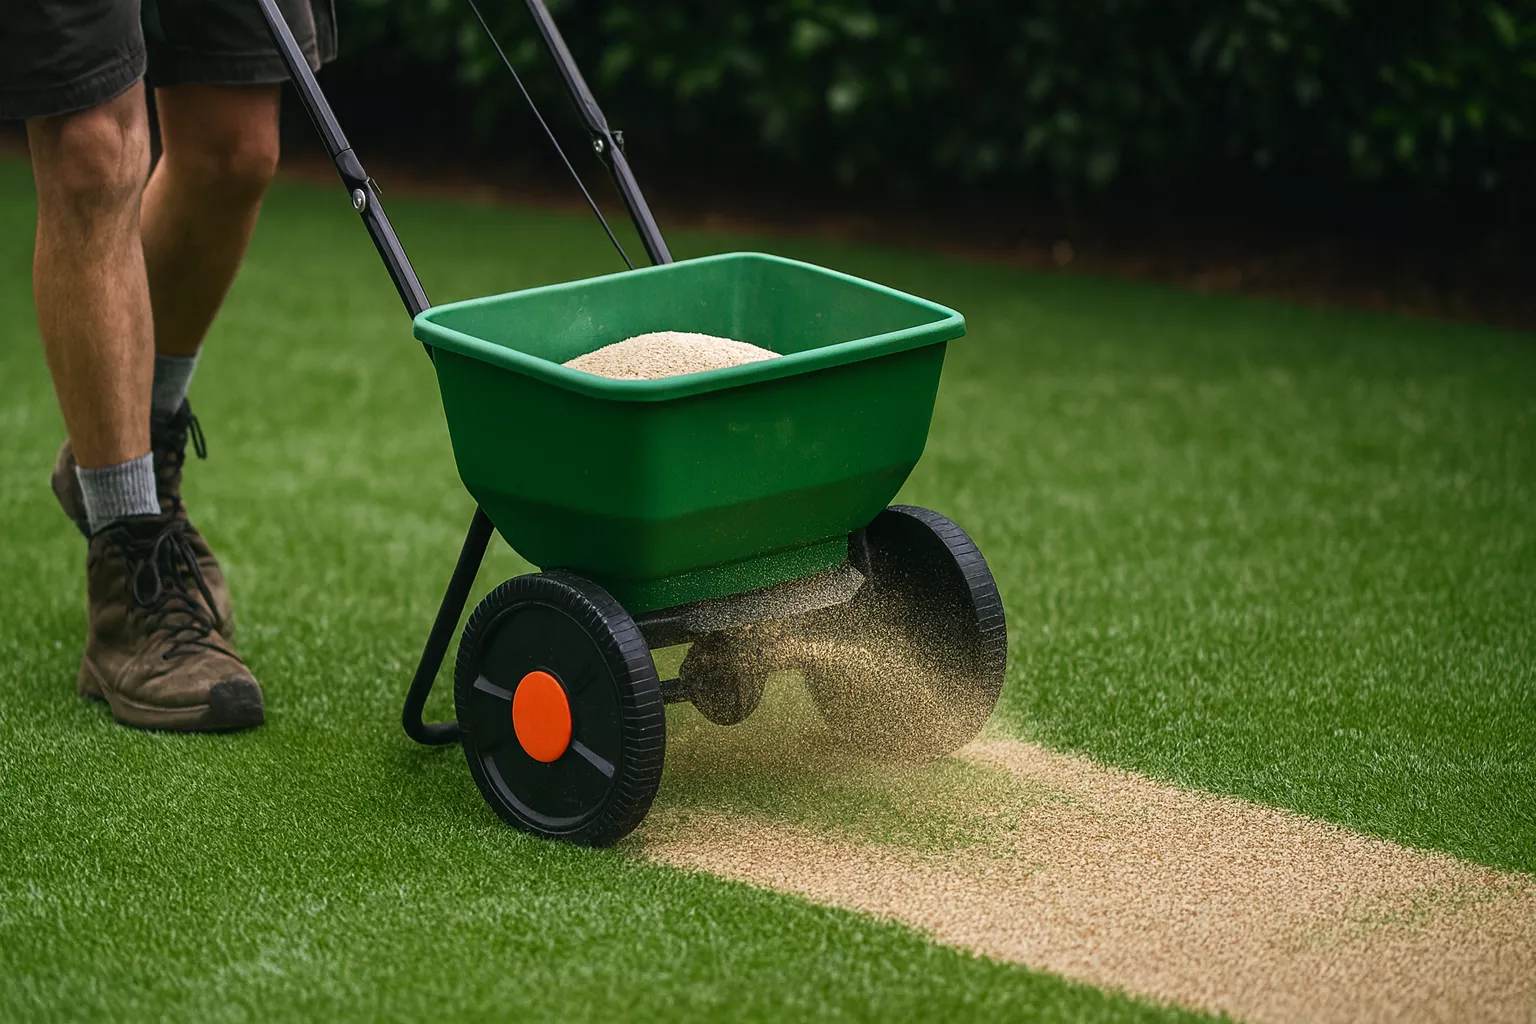
Infill Application
Apply and distribute infill to add stability, resilience, and natural appearance.
- Select infill type (silica, TPE, zeolite)
- Spread in multiple lifts for consistency
- Power brush to settle infill evenly
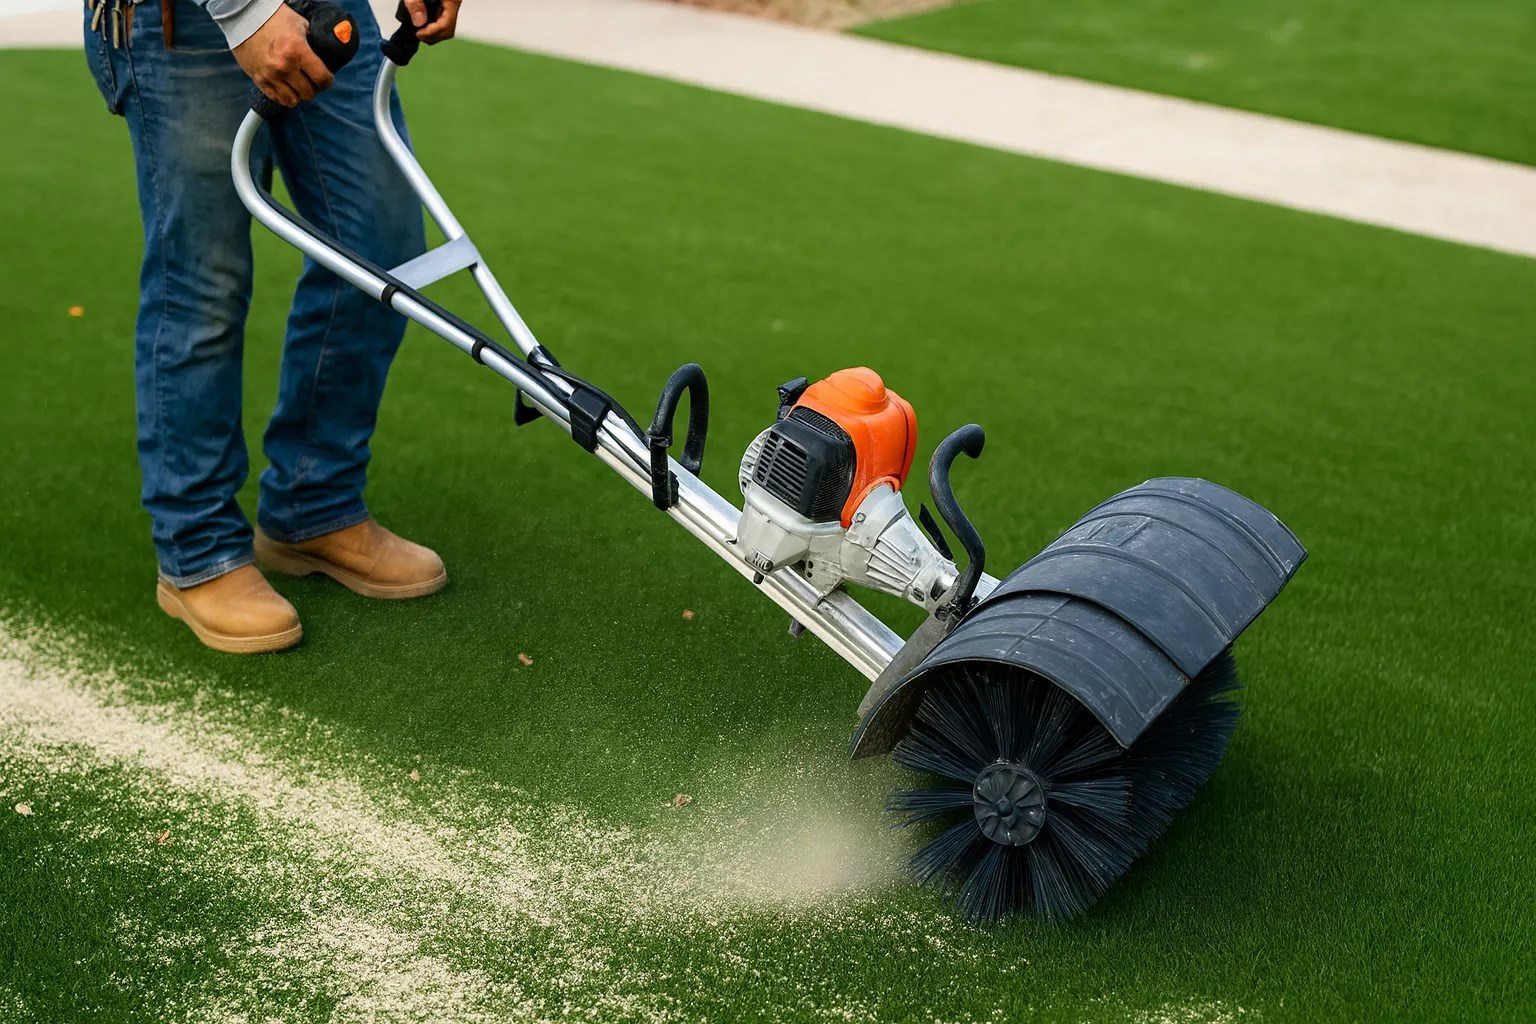
Final Grooming & Inspection
Brush fibers upright, perform quality checks, and walk through care guidance with you.
- Inspect seams, edges, and infill levels
- Final power brushing and detailing
- Provide maintenance tips and warranty info
These installation steps reflect our standard workflow. Depending on the project type, site conditions, and specific requirements, the order may change and additional steps may be added to ensure the best results.
1) All estimates are based on site conditions at the time of inspection. Final pricing and scope may vary depending on site preparation, access, and unforeseen conditions.
2) Manufacturer warranty is provided by the turf manufacturer and may vary by product. Workmanship warranty covers installation only and does not include damage from misuse, pets, natural wear, or improper maintenance.
3) We strive for 100% customer satisfaction. Results may vary depending on project conditions.
Ready to Start Your Installation?
Get your free consultation and detailed installation quote today. Our experts are ready to transform your space!